Adding a User Account
Adding a user is one of the most basic tasks you will encounter in administering your system. To add a user:
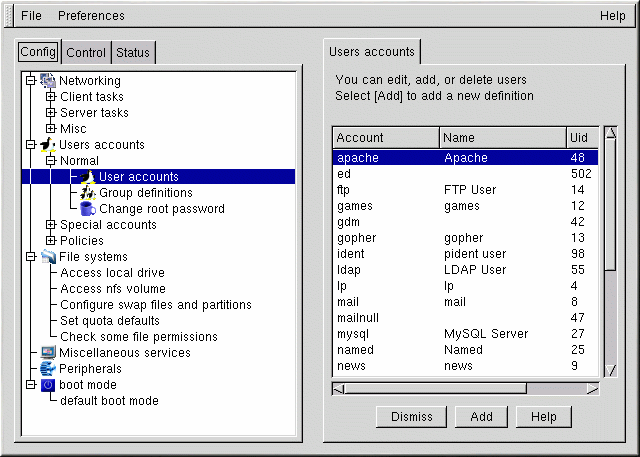
Open Config => Users accounts => Normal => User accounts. Linuxconf may show you a filter screen (see Figure 14-2).
You can use the filter screen to select a smaller range of accounts than the full list. To get the full list, select Accept without changing any of the parameters. For detailed information on the various filters, select the Help button on the Filter control screen. Once you've applied or bypassed the filter, you'll see the Users accounts tab (see Figure 14-4).
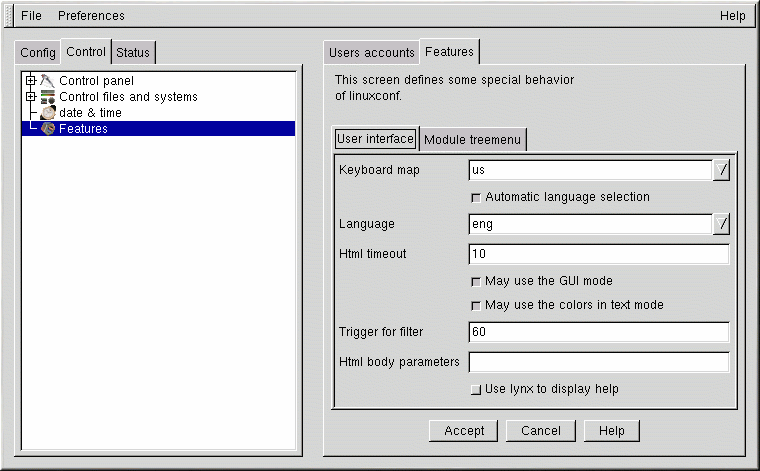
You can control the filter using Control => Features. You'll see the Features tab, which allows you to set the Trigger for filter parameter, as shown in Figure 14-3.
The Trigger for filter field sets the number of entries that will pop up a filter screen.
Select Add. This will open the User account creation tab (see Figure 14-5).

The User account creation screen includes the Base info, Params and Privileges sections. Only the Login name is required, but you should be aware of the other fields, which you may or may not want to fill in.
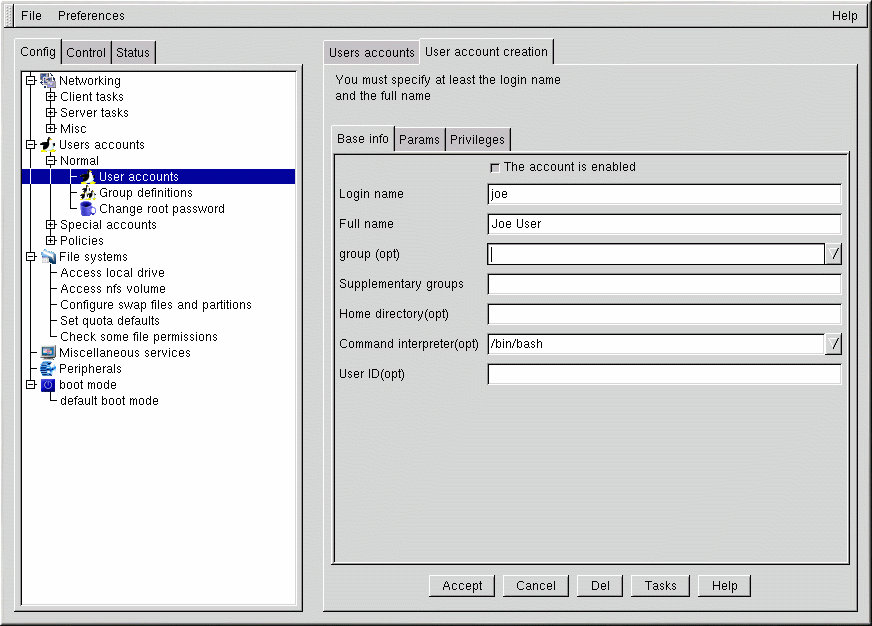
Base info for User Accounts
The Login name is the name of the account and is usually all lowercase letters. First or last names, initials or some combination thereof are fairly common login names. For a user named John T. Smith, smith, john, jts, or jsmith would be common user names. Of course spike or something else works just fine, too. You can also use numbers, so jts2 would be fine if you had a second person with the same initials. There is no default for this field.
The Full name is the name of the user or the account. For an individual, it would be their name, John T. Smith for example. If the account represents a position rather than a person, the full name might be the title. So an account called webmaster might have a full name of Red Hat Webmaster or just Webmaster. There is no default for this field.
Since Red Hat Linux uses the User Private Group scheme, each user will be assigned to a default group consisting only of the user. For more information on User Private Groups, see the Official Red Hat Linux Reference Guide.
In the Supplementary groups field, you can specify additional groups. Group names should be separated by spaces. The default for this field is blank, meaning no supplementary groups are specified.
The Home directory specifies the home or login directory for the account. The default is /home/login, where login is replaced by the login name. A home directory is your starting point in the directory structure when you log in, or if in X, for each Xterm window opened. This is also where account specific preference files are stored.
The Command interpreter is the default shell for the account. The bash shell is the default shell for Red Hat Linux.
The User ID (UID) is the number associated with each user account. This is automatically generated by the system when the account is created, so just leave this field blank. The system uses the UID to identify an account.
Params for User Accounts
The Params are used for password and account management. By default, all of the settings are Ignored, so they are unused. Must keep # days sets a minimum number of days for a user's password.
The Must change after # days field can be set to make a user's password expire after a certain number of days. If you want to warn them that the password is going to expire (a good idea), the Warn # days before expiration field should be used.
If you'd like to have their account set to expire after a certain number of days, use the Account expire after # days field. You could alternatively set an Expiration date.
Privileges for User Accounts
In the Privileges section, you can grant access and/or control over various aspects of system configuration. As a default, regular users are denied all privileges on this screen. You may instead choose to grant or to silently grant them specific privileges. The difference between Granted and Granted/silent is that if the privilege is granted, Linuxconf will ask for the user's password before allowing them the privilege. If the privilege is granted silently, Linuxconf will not prompt for their password.
Generally, careful system administrators won't grant users any system configuration privileges unless it is absolutely necessary. If you do grant privileges, be careful when granting them silently. If a user with silently granted privileges logs in to his/her machine and walks away, their privileges are wide open for the next person who sits down at their desk. Silently granted privileges are less risky if used on machines in a physically restricted area.
May use Linuxconf: the user is allowed to access all of Linuxconf's capabilities, and they can set up or change linuxconf parameters. Note that use of linuxconf is separate from the privilege of activating configuration changes. System administrators might want to grant the use of Linuxconf, but deny the activation privilege, so that the sysadmin has a final "yes/no" on whether to activate any configuration changes.
May activate config changes: After you change a parameter in Linuxconf, at some point you'll have to indicate to Linuxconf that the changes you made should be applied. Depending upon the flavor of Linuxconf that you're using, you might do this by choosing File => Act/Changes from the pulldown menu in the GUI version of Linuxconf, or clicking on an Accept button in Web-based Linuxconf, or selecting an Accept button in text-mode Linuxconf, etc.
You can grant the privilege of activating changes to a user. In that case, the user will be able to activate any changed system configuration parameters in Linuxconf.
May shutdown: A user can be granted the right to
shutdown the system. Note that Red Hat Linux is set in
/etc/inittab to cleanly shutdown following the
You can also grant the user the privileges to switch network modes, to view system logs, and even give someone superuser equivalence.
Once you have entered the login name and any other desired information, select the Accept button at the bottom of the screen. If you decide against creating a new user, select Cancel instead.
When you click on Accept, Linuxconf will prompt you to enter the password. You'll have to re-type the password, to prevent unusable passwords caused by typos. Passwords must be at least six characters in length, but you can increase the required length and set other parameters for users' passwords at the Users Accounts => Policies => Password & Account Policies screen.
Good passwords contain a combination of letters, numbers, and special characters. A password should use both upper case and lower case letters. Don't use your username, your anniversary, your social security number, your dog's name, your middle name or the word root. Don't use any variation of a word associated with your account or with yourself. Don't use a word that can be found in a dictionary; dictionary words are easy to crack.
A simple technique for creating a password is to use the first letters from each word of a phrase that is familiar to you (a line from a favorite song might be appropriate). Make a few letters uppercase, and insert a few numbers and/or special characters in place of letters and you'll have a decent password.
Press the Accept button again when finished. The system will let you know if it thinks the password is easy to crack; if you get a warning message, don't use the password.